How to Make Line Continuous Between Years in Tableau
This content is excerpted from my book, Innovative Tableau: 100 More Tips, Tutorials, and Strategies, published by O'Reilly Media Inc., 2020, ISBN: 978-1492075653. Get the book at Amazon.
Timelines are not an out-of-the-box chart type in Tableau, but they can serve several practical purposes for your analyses and user experience. First, a timeline in Tableau can be used as a method for showing end users when notable events occurred in the business. For example, you can provide context by lining up a timeline of marketing promotions with a trend line to see when spikes align with your marketing efforts.
Second, a timeline can be used as a calendar showing upcoming dates of interest. In both use cases, you can use (1) a relative date filter in Tableau to dynamically display a subset of dates and (2) add dashboard actions to link to more information about notable events / dates on the timeline.
This tutorial shares how to make a timeline in Tableau and how to add an optional reference line to display the current day.
Related video tutorial:

Premier Tableau eLearning from Playfair Data TV
The Trick to Building a Timeline in Tableau
To illustrate how to make a timeline in Tableau, we'll be reverse-engineering my Where's Ryan visualization. In the dashboard, I have a timeline at the top to display the next 90 days of speaking events. The final timeline looks like this:

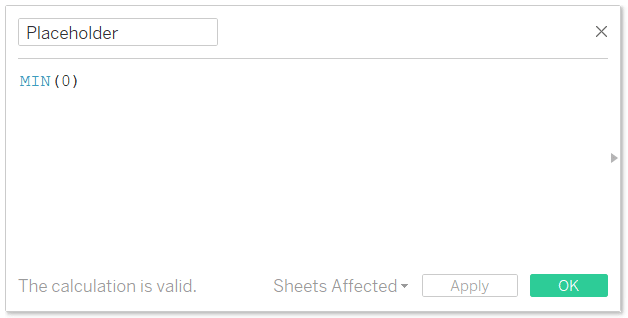
The trick to building a timeline in Tableau is to create a placeholder calculated field. This calculated field will eventually be used to make all of the dates line up in a straight line on the timeline. The formula for my placeholder field is simply MIN(0).
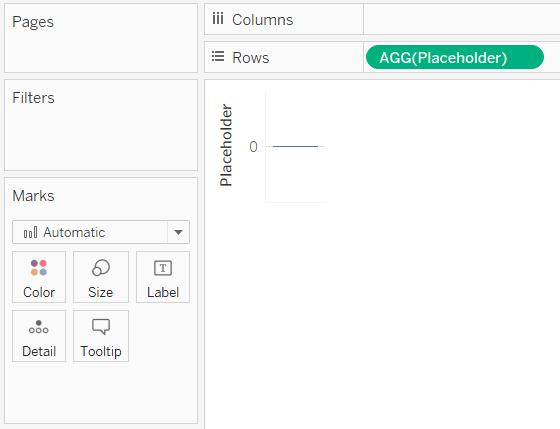
For a horizontal timeline (as pictured above), place the newly created Placeholder calculated field on the Rows Shelf.
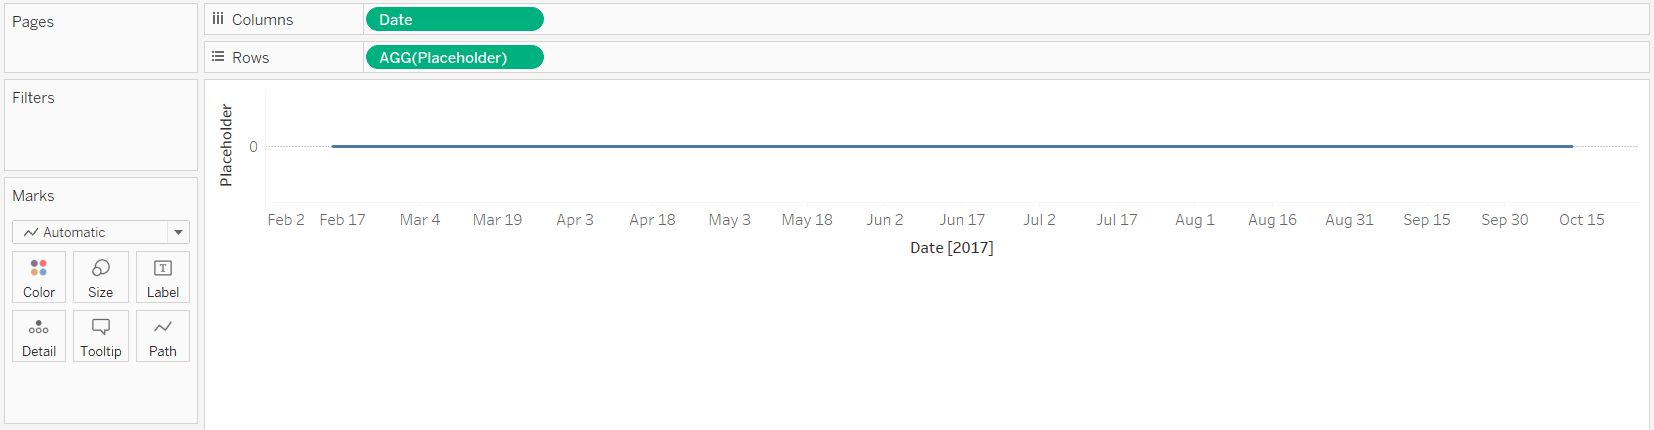
Next, place the Date field that you want to use as your timeline on the Columns Shelf. At this step, I like to choose Date (Continuous) as the date part so I can use the most granular date available (in this case, day) and use the field as continuous. To do this, on a PC, right-click and drag the date field onto the Columns Shelf, and pick the very first option that is presented after letting go of the field. At this point, my view looks like this:
Adding Each Event to the Timeline
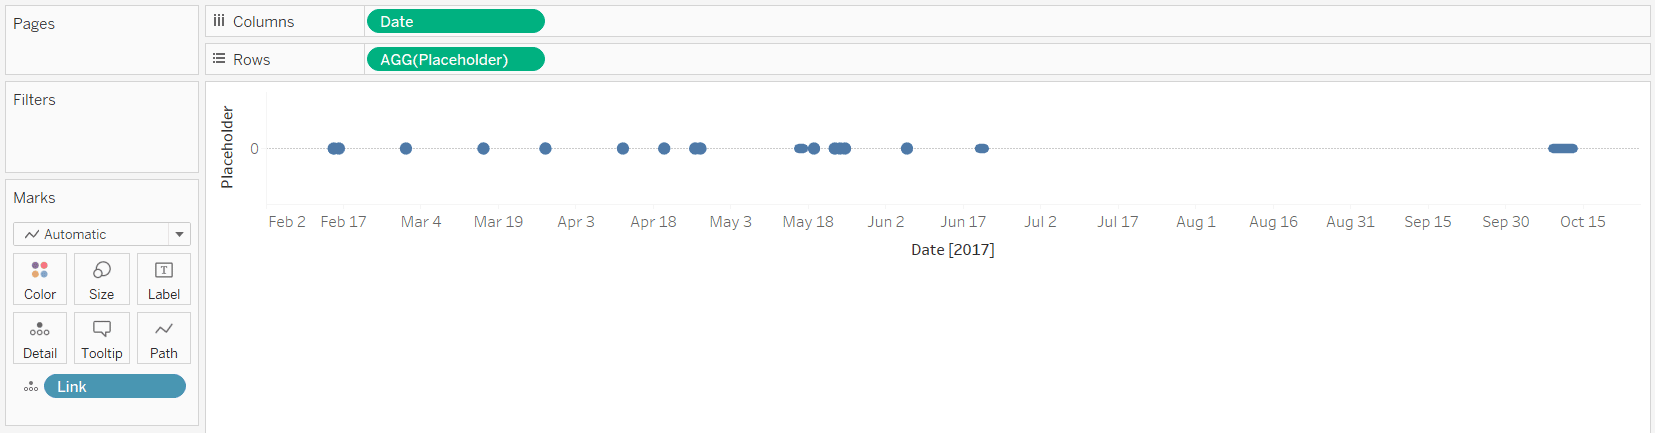
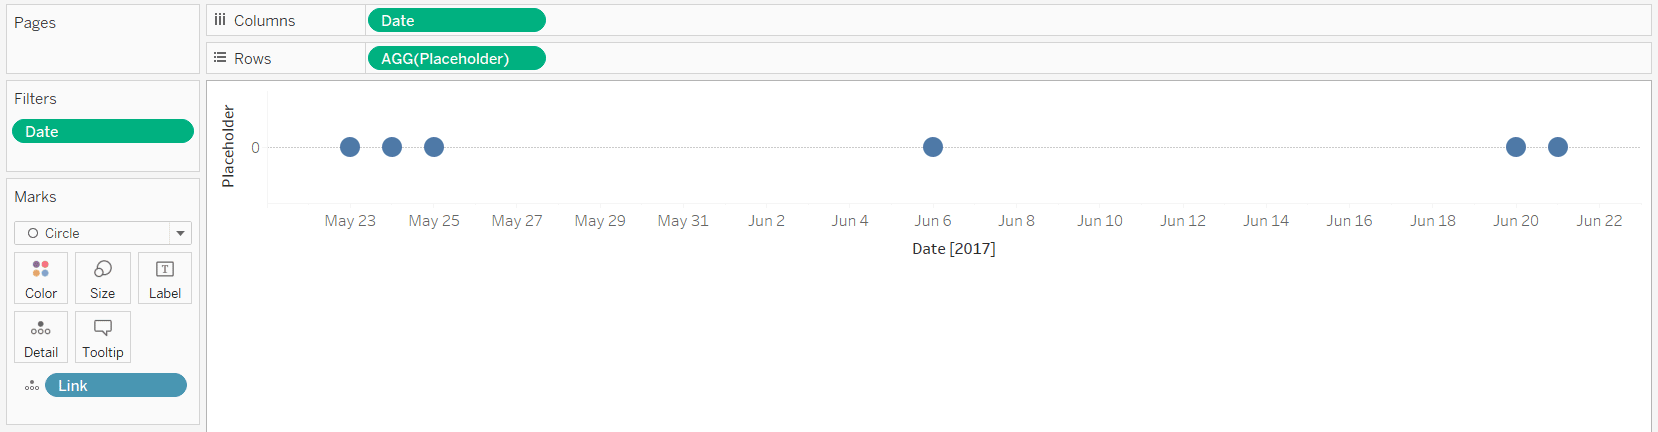
We've now laid the foundation of the timeline. To display events on the timeline, drag your dimension that represents your events to the Detail Marks Card. Note that for the events to line up in the correct place, each event needs a corresponding Date (the same field that is on the Columns Shelf) in the underlying data. Here's how my timeline looks for each speaking engagement I currently have scheduled for the year (the "Link" dimension is being used for events).
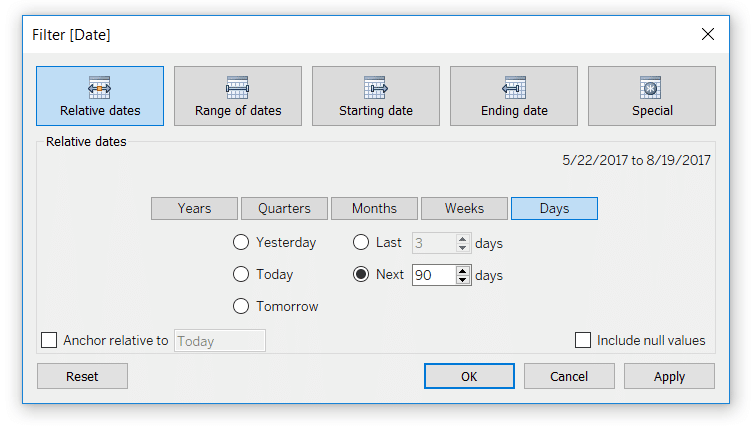
Since some of my dates have passed, and because most events are not scheduled more than a few months in advance, I will add a relative date filter to only show the next 90 days. To do so, drag the Date dimension to the Filters Shelf and choose "Relative Date". From here, you can set the logic to be any subset of dates that you want to dynamically display.
How to Use Tableau Sets to Create Relative Date Filters
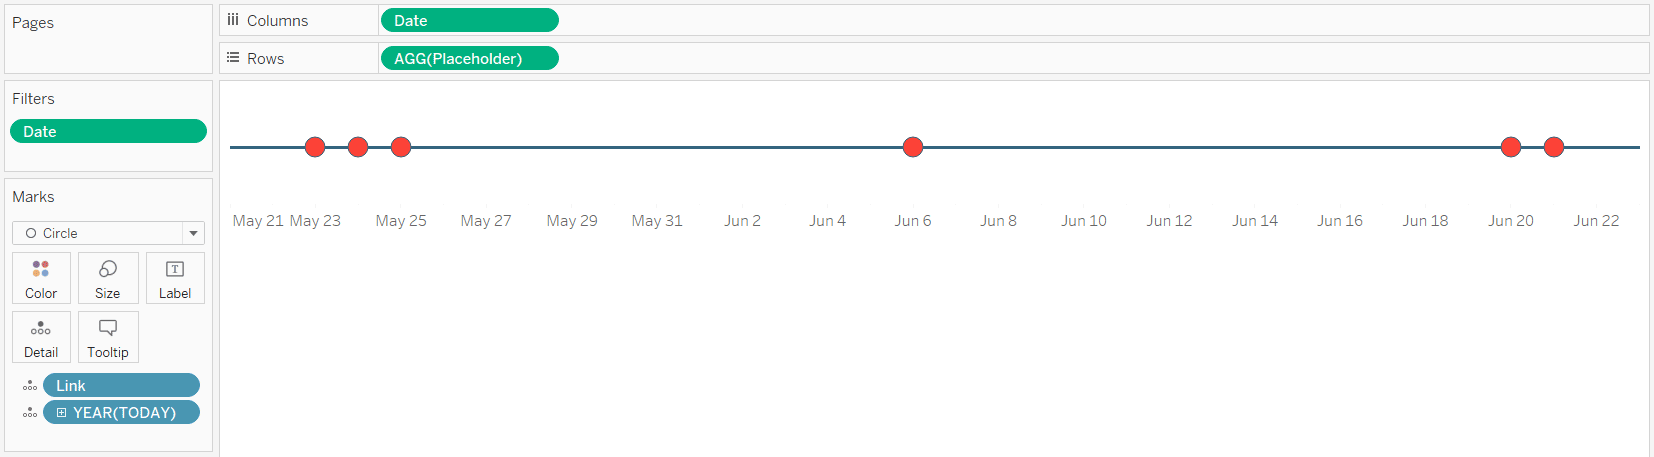
Here's how my view looks after limiting the date range to the next 90 days and changing the mark type to Circle.
Timeline Formatting Tips
Lastly, a few points on formatting:
– Because the Placeholder field equals 0, all dates will always line up on the Y-Axis (for a horizontal timeline) of 0. This means we can format the "zero lines" on the view to give the timeline itself a customized look. You can control the weight, format, and color of the zero lines.
– You should hide the Placeholder header by right-clicking the Y-Axis and deselecting "Show Header".
– I don't like the light gray lines that still show after hiding the header. These are called axis rulers, and can be turned off by right-clicking anywhere in the view, choosing "Format…", navigating to the Lines tab, and choosing "None" for "Axis Rulers".
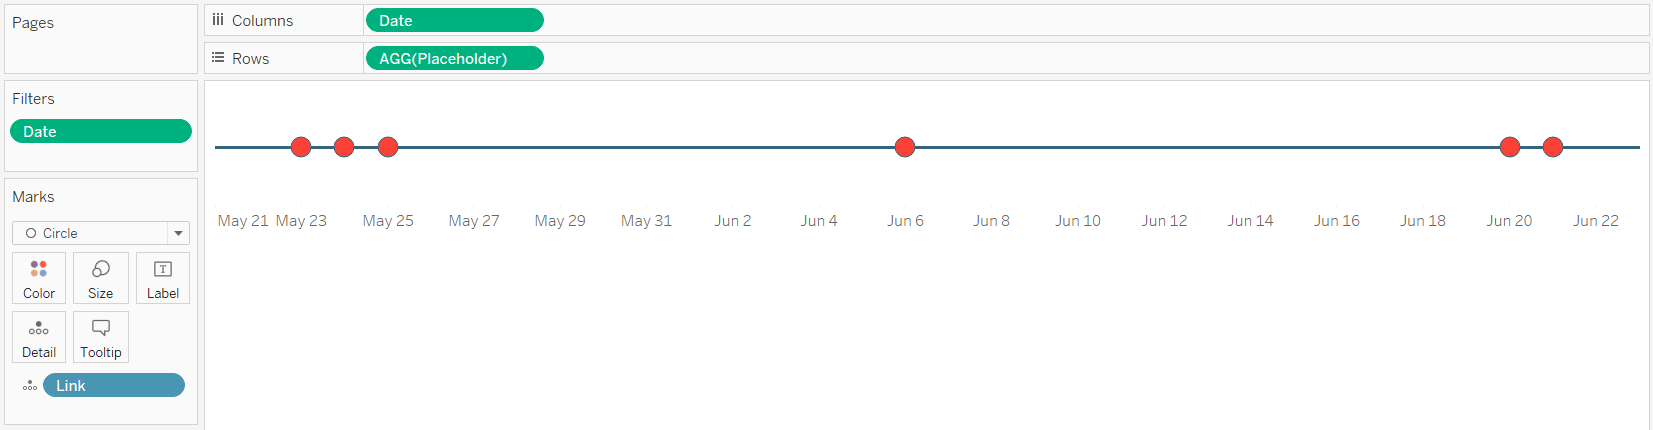
Here's how my timeline looks after a few formatting tweaks.
This sheet can now be used alongside other views on a dashboard to provide context or a calendar of events. If you want to link to events on the timeline, use URL dashboard actions.
How to Display a Reference Line for the Current Date
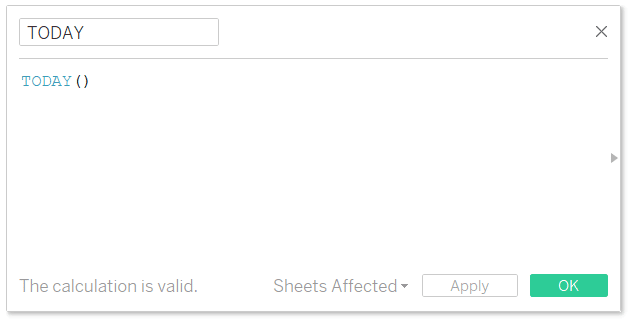
If you would like to take your timeline a step further by dynamically displaying the current date, start by setting up a calculated field to isolate "today". The formula is TODAY().
Place this newly created calculated field onto the Detail Marks Card. This allows it to be used as a reference line.
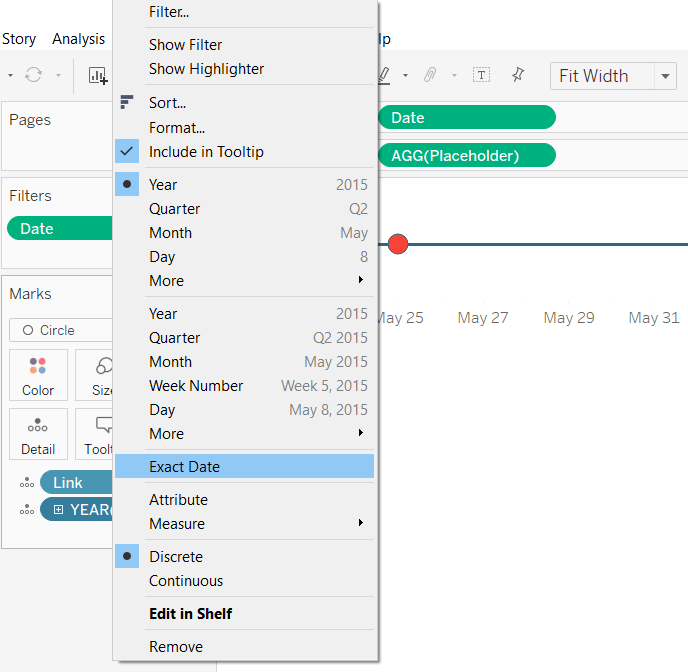
Notice that the default date part for this field once it was placed on the Detail Marks Card is Year (Discrete). The critical step to get this to work properly as a reference line displaying the current date, is to right-click on the field for today's date and choose "Exact Date".
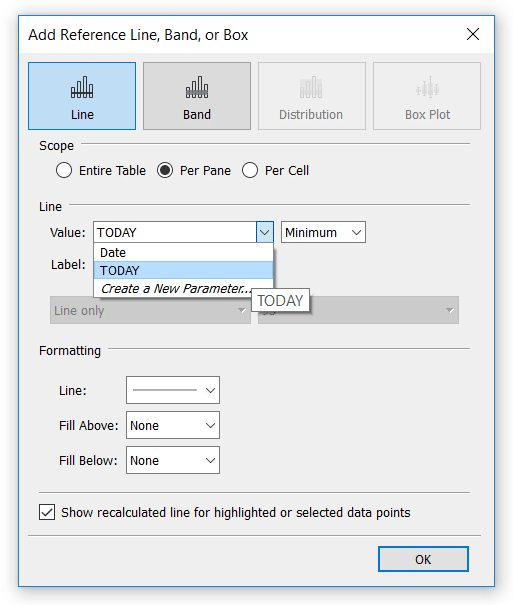
After you've changed this to Exact Date, you can add it as a reference line just as you would normally. For me, I like to right-click on the axis, choose "Add Reference Line", and choose the Today field as the reference line.
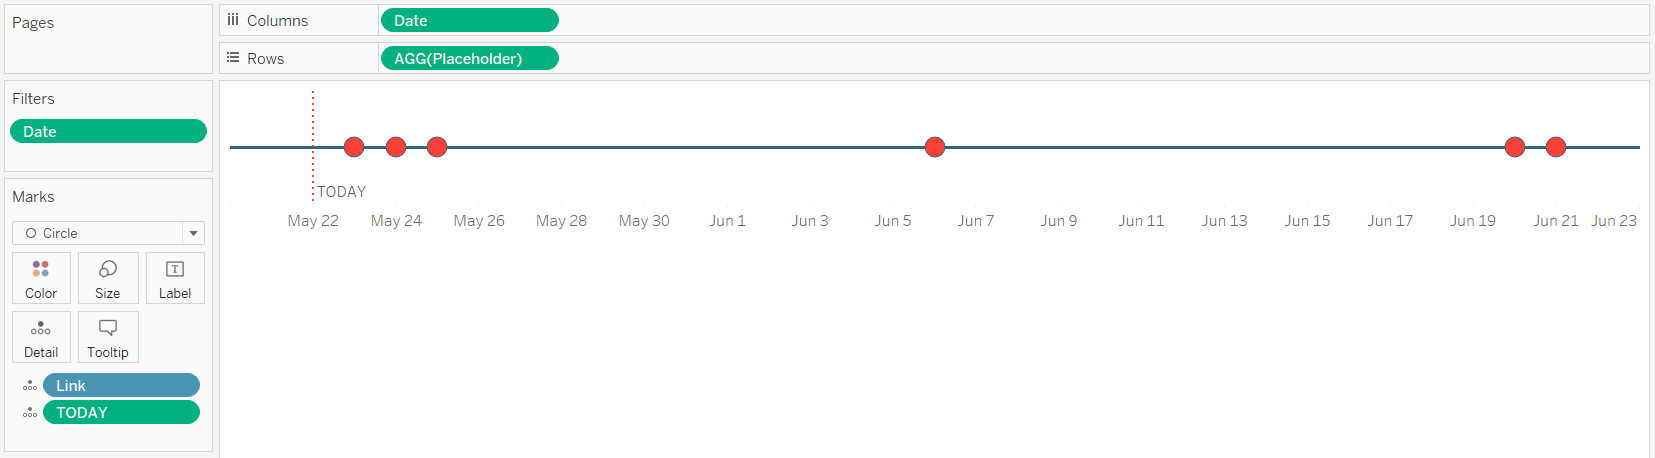
Here's how my final timeline looks after adding the reference line and formatting it.
Thanks for reading,
– Ryan
bridgetherkilinde1950.blogspot.com
Source: https://playfairdata.com/how-to-make-a-timeline-in-tableau/
0 Response to "How to Make Line Continuous Between Years in Tableau"
Post a Comment